How do air pockets affect automotive coolant systems?




Air pockets interrupt heat transfer and coolant circulation. A trapped pocket near a cylinder head can create a local hot spot before the dashboard temperature gauge shows an obvious problem. Air in a heater core can produce weak or fluctuating cabin heat, while air reaching a pump can reduce its ability to move coolant. If overheating or poor heater performance begins after a cooling system has been drained, opened, or run low, trapped air is a strong possibility—but the reason the system lost coolant still needs to be found.
The repair starts with a cold-system inspection and the vehicle manufacturer’s filling and bleeding procedure. A successful bleed produces stable operating temperatures and consistent heat under the specified test conditions. Bubbles that continue to return, repeated coolant loss, or rapid pressure buildup call for further diagnosis rather than repeated bleeding alone.
What trapped air does inside the cooling circuit
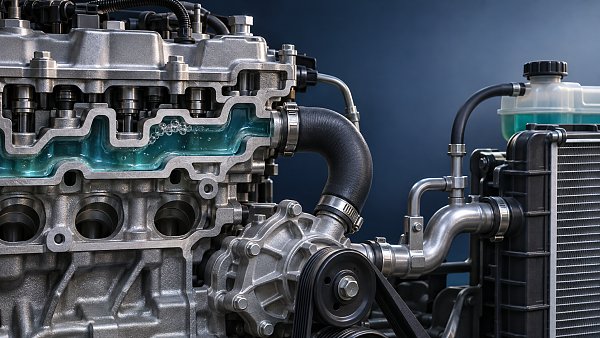
Liquid coolant carries heat away from the engine and releases it through the radiator and heater core. Air transfers heat much less effectively. When it collects against a hot metal surface, that area can become hotter than surrounding coolant-wetted surfaces. The temperature sensor measures conditions at its own location, so a normal gauge reading does not prove that every part of the engine is being cooled evenly.
A pocket can also restrict flow through a high point in a hose, heater core, or engine passage. If enough air enters the pump inlet, the pump can lose its prime or move a mixture of air and coolant instead of a solid stream of liquid. Flow then becomes unstable, and the cooling system may struggle most at idle or after a change in engine speed.
Thermostat operation can be affected as well. A thermostat relies on heat reaching its sensing element; an air pocket around that area can delay or disrupt its response. However, a cool radiator hose or a temperature swing alone does not establish that trapped air is responsible. Thermostat design, operating temperature, fan operation, and flow through the rest of the circuit all influence those observations.
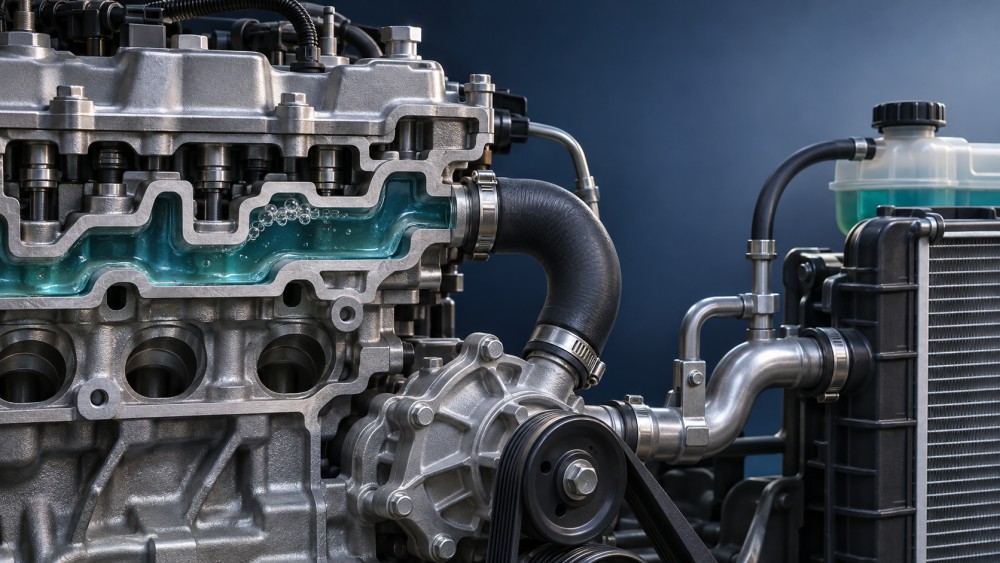
Air and vapor are related but different diagnostic clues. Trapped air often follows a low coolant level or a repair that opened the circuit. Vapor can form when coolant boils at a local hot spot, including one created by poor circulation. Combustion gases can also enter the coolant through an internal engine fault. Seeing bubbles therefore identifies gas in the system, not necessarily its source.
Symptoms that point toward an air pocket
The strongest clue is a symptom that appears immediately after coolant replacement, hose work, radiator replacement, thermostat service, or a repair to the heater circuit. The following patterns are useful when considered alongside service history and coolant level:
- Cabin heat changes with engine speed. Heat may fade at idle and return when the engine speed rises because flow through a partially air-bound heater core improves temporarily. Low coolant level, a restricted core, or a weak pump can produce a similar result.
- Gurgling behind the dashboard. Coolant and air moving through the heater core can make a sloshing sound, especially during warm-up or acceleration. A quiet heater core does not rule out trapped air elsewhere.
- Temperature rises and then drops abruptly. A moving pocket or delayed coolant circulation can cause an unstable reading. Compare the gauge with scan-tool data where available, and assess the complete cooling system before replacing a thermostat.
- The level falls after a refill. As air leaves the circuit and the system cools, coolant can move from the reservoir into the system. A level that repeatedly falls after a verified bleed requires a search for leaks or another source of gas.
Heater hose temperatures can help narrow the problem, but they are not a stand-alone test. Two cool hoses may indicate low coolant, restricted supply, a closed valve where fitted, or air preventing circulation. A hot inlet and substantially cooler outlet can point toward restricted flow through the core, although normal heat removal, airflow across the core, and the vehicle’s control strategy affect the temperature difference. Poor cabin heat with both hoses hot also directs attention toward air doors or HVAC controls.
Where the air comes from
Opening the system allows coolant to drain and air to occupy passages that are difficult to refill from a single point. Long hose runs, elevated heater cores, integrated valve assemblies, and auxiliary cooling circuits create places where air can remain even when the expansion tank appears full. Filling too quickly can leave a pocket behind a high point or closed valve.
A low coolant level has its own cause. External leaks at hose connections, the radiator, pump, reservoir, cap, or other components can let the level drop. On cooling, a system that cannot draw coolant back correctly may admit air through a leaking connection or a fault in the reservoir and cap arrangement. Inspect the entire recovery path rather than assuming that a full-looking bottle proves the engine circuit is full.
Internal leakage is another possibility when gas returns after a careful bleed. Combustion gases entering the coolant can displace liquid, pressurize the system, and produce repeated bubbling or coolant expulsion. A failed head gasket is one possible cause, but a bubbling reservoir alone is insufficient evidence. Use the appropriate pressure, combustion-gas, and engine diagnostic tests for the vehicle, and interpret each result alongside the symptoms.
Bleeding the system without creating a second problem
Begin with the engine and cooling system cold. A hot system can retain pressure, and opening its cap or a bleed point can release scalding coolant and steam. Confirm that the original leak or component fault has been addressed, that hoses and clamps are secure, and that the correct coolant and mixture are available. Mixing incompatible coolants or using the wrong concentration can introduce problems unrelated to air removal.
Follow the vehicle-specific service information for the fill point, bleed screws, heater settings, engine speed, and warm-up sequence. Cooling system layouts differ: some purge through a designated high-point screw, some use a pressurized expansion tank, and others require a vacuum filling tool or an electronic service routine. A generic “leave the cap off and idle” approach is not suitable for every design.
- With the system cold, fill at the specified location. Open only the bleed points identified in the procedure, and close each as directed when the specified coolant flow is reached. Protect electrical components and painted surfaces from spills.
- Where prescribed, use a vacuum filling tool and the specified adapter. A system that does not hold vacuum needs investigation before filling; a vacuum test does not replace every pressure or leak test, and tool connections themselves can also leak.
- Set the heater controls as instructed. On some vehicles, the control setting affects coolant flow through the heater circuit; on others, a blend door controls cabin temperature while coolant continues to circulate. Follow the specified setting rather than assuming that maximum heat opens a coolant valve.
- Run any required pump or valve activation routine. Some vehicles need a scan tool or a defined control sequence to circulate coolant through auxiliary branches. Observe temperature data and warning messages throughout the procedure.
- After the specified warm-up and purge, allow the system to cool fully. Recheck and adjust the level at the correct cold mark, then inspect for leaks. Never use a hot reading as a substitute for the required cold-level check.
Do not loosen an unspecified hose or fitting to force air out. Some connectors, plastic bleed screws, and seals are easily damaged, and an improvised high-point vent can create a leak that draws air back in during cooldown. Use the prescribed torque or closure method where one is given.
When the same symptom returns
If heat improves during the bleed but fades again after a drive, first establish whether the coolant level changed after a complete cooldown. A lower level can indicate residual air has moved out, but repeated level loss calls for leak testing and a review of the fill procedure. Look for dried coolant residue and inspect areas that leak only under pressure or at operating temperature. A cooling-system pressure test can reveal external leaks, although a negative result does not exclude every intermittent or internal fault.
Persistent bubbling from a cold start, hoses becoming unusually firm soon after startup, coolant being pushed out, or overheating under load can justify testing for combustion gases. None of these observations proves an internal engine fault on its own. Cooling fan problems, a restricted radiator, a stuck thermostat, a damaged pump, and an incorrect pressure cap can also cause overheating or coolant loss without an air pocket being the original defect.
A completed repair should be assessed under the conditions that produced the complaint. With the system sealed as specified, observe warm-up, heater output, temperature stability, and fan operation. After the engine has cooled, verify the level again. If symptoms persist with a stable coolant level and a correctly purged circuit, continue diagnosis of flow, heat rejection, and HVAC controls rather than repeating the same bleed indefinitely.
Electric and hybrid cooling circuits need separate attention
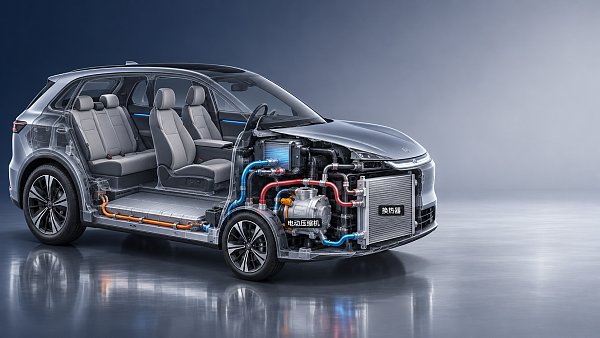
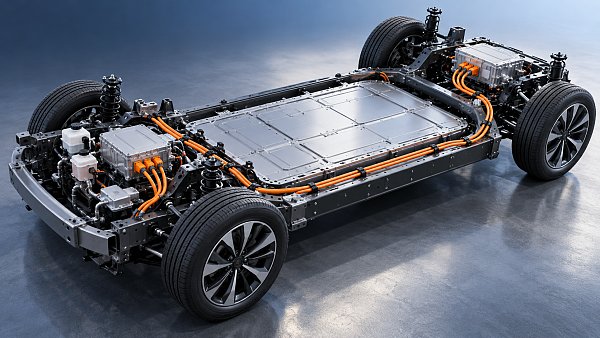
Electrified vehicles can have multiple coolant circuits serving the battery, power electronics, and cabin heating equipment. Their reservoirs, pumps, valves, and fill procedures may be separate from an engine cooling circuit. A full reservoir in one circuit says nothing about air in another, and a heater complaint does not automatically identify which loop is affected.
Electric pumps and electronically controlled valves may need to be commanded through a service routine to move coolant through every relevant branch. An incomplete routine can leave a pocket in a component that has little or no flow during ordinary idling. Use the specified coolant for each circuit and follow the vehicle’s high-voltage service precautions when work is near energized components. If a pump is noisy or a temperature fault returns after the prescribed purge, inspect the circuit and control operation before concluding that the pump itself has failed.
Have questions about this sector analysis, or seeking best practices specific to your niche? Drop us a line below and let the senior consultants at GAC assist you.
“We respect your privacy. Your information is strictly confidential.”
Related News
- 00
0000-00
What does AEC-Q100 qualification mean for automotive camera systems? - 00
0000-00
How to verify a waterproof connector supplier's IP ratings - 00
0000-00
How do air pockets affect automotive coolant systems? - 00
0000-00
How to identify automotive component export opportunities in new markets - 00
0000-00
How to assess a smart cockpit electronics manufacturer's integration capability
Tags
Weekly Insights
Stay ahead with our curated technology reports delivered every Monday.
Recommended News
 What does AEC-Q100 qualification mean for automotive camera systems?Automotive Camera Systems AEC-Q100 qualification: Discover what it means for IC reliability, temperature grades and camera validation before approving a design.Author:Time:Nov 22, 2026
 How to verify a waterproof connector supplier's IP ratingsWaterproof connector supplier IP ratings: learn how to verify test reports, match configurations and reduce automotive sourcing risks before you buy.Author:Time:Nov 21, 2026
 How do air pockets affect automotive coolant systems?Automotive Coolant Systems can overheat when air pockets disrupt coolant flow. Discover the warning signs, safe bleeding methods, and when to seek further diagnosis.Author:Time:Nov 20, 2026
 How to identify automotive component export opportunities in new marketsDiscover Automotive Component Export opportunities in new markets by assessing buyer access, technical fit, trade requirements, and landed costs.Author:Time:Nov 19, 2026
 How to assess a smart cockpit electronics manufacturer's integration capabilityAssess a smart cockpit electronics manufacturer's integration capability with practical checks for interfaces, testing, safety, cybersecurity and supplier support.Author:Time:Nov 18, 2026
 How does a shielded HSD cable reduce interference in vehicles?Discover how a shielded HSD cable reduces vehicle interference, and learn why connector design, routing, and testing matter for reliable high-speed data links.Author:Time:Nov 17, 2026
 What drives demand for scroll compressors in the automotive market?Explore the scroll compressor for automobile market and discover how EV adoption, heat pumps, efficiency, and supplier capabilities shape demand.Author:Time:Nov 16, 2026
 Does AEC-Q200 apply to flexible printed circuits?Flexible Printed Circuit AEC-Q200 requirements explained: discover which components qualify and how to assess automotive FPC reliability.Author:Time:Nov 15, 2026
 How does production volume affect automotive flexible electronics costs?Explore how production volume affects automotive flexible electronics cost, from tooling and yield to testing. Compare quotes and negotiate smarter.Author:Time:Nov 14, 2026
 How much does an in-vehicle infotainment system cost to replace?Explore in-vehicle infotainment cost, from affordable repairs to factory replacements. Compare options, installation fees, and compatibility before you buy.Author:Time:Nov 13, 2026
 How does condenser efficiency affect heat pump performance?Discover how condenser high efficiency can improve heat pump performance, reduce compressor power, and boost heating COP—plus the trade-offs to watch.Author:Time:Nov 12, 2026
 What does each FAKRA cable color code mean?FAKRA cable color code explained: Explore common connector colors, typical uses and key compatibility checks before choosing a replacement.Author:Time:Nov 11, 2026
 How to compare noise ratings for battery coolant pumpsCompare coolant pump low noise ratings with confidence. Learn how test conditions, hydraulic duty, tonal noise and installation affect your choice.Author:Time:Nov 10, 2026
 How bright should automotive display systems be in sunlight?Automotive Display Systems need more than brightness to stay readable in sunlight. Discover why 1,000 nits is a starting point and how to evaluate glare and heat.Author:Time:Nov 09, 2026
 How heat pumps improve the efficiency of EV thermal systemsEV Thermal Systems use heat pumps to reduce heating energy demand. Explore how they work, where they excel, and what limits efficiency in cold weather.Author:Time:Nov 08, 2026
 Can a smart cockpit platform support multiple displays?Can a smart cockpit platform support multiple displays? Explore key requirements for performance, safety, connectivity, and supplier evaluation.Author:Time:Nov 07, 2026
 How is automotive connector vibration resistance tested?Automotive connector vibration resistance testing reveals hidden contact failures. Explore test profiles, continuity monitoring and pass criteria.Author:Time:Nov 06, 2026
 How heat pumps save energy in automotive cabin climate systemsAutomotive Cabin Climate Systems energy saving starts with smarter heat pump design. Explore real-world efficiency, cold-weather trade-offs, and testing tips.Author:Time:Nov 05, 2026
 Is an EV heat pump worth it for winter driving range?Is a heat pump worth using in a cold-climate EV? Discover how it affects winter range, when it pays off, and what to check before buying.Author:Time:Nov 04, 2026
 When should you use 50-ohm coaxial cable instead of 75-ohm?Coaxial cable 50 ohm or 75 ohm? Learn when to use each, avoid impedance mismatches, and choose the right cable for reliable RF and video performance.Author:Time:Nov 03, 2026
 How to select a high temperature motor harness for an EVChoose the right high temperature motor harness for your EV. Compare thermal limits, current capacity, shielding, routing, and validation evidence.Author:Time:Nov 02, 2026
 How much does electric power steering replacement cost?Electric power steering price typically ranges from $1,000 to $3,000 for major replacements. Discover cost factors, repair options, and tips for comparing quotes.Author:Time:Nov 01, 2026
 How to size an EV A/C compressor for the required cooling capacitySize an EV A/C Compressor with confidence. Explore cooling loads, performance maps and power limits to select the right compressor for your vehicle.Author:Time:Oct 31, 2026
 How to choose the right pitch for an FPC board connectorFPC board connector pitch affects space, assembly and reliability. Learn how to compare options and select the best fit for your design.Author:Time:Oct 30, 2026
 How zonal design affects harness routing in high-voltage EV architecturesExplore high-voltage electrical architecture zonal design and its impact on EV harness routing. Discover key trade-offs in cable length, safety, thermal performance, and service access.Author:Time:Oct 29, 2026
 How tariffs affect costs in global automotive parts supply chainsNavigate tariffs in the global automotive parts trade supply chain. Learn to compare landed costs, manage duty exposure, and uncover smarter sourcing strategies to protect your margins.Author:Time:Oct 28, 2026
 How to assess vendor lock-in in a software-defined vehicle platformAssess Software-Defined Vehicle platform lock-in with practical tests for API portability, data access, update control, and exit costs. Learn how to choose a platform with a proven exit path.Author:Time:Oct 27, 2026
 How ISO 26262 guides functional safety in steer-by-wire systemsExplore steering systems functional safety through ISO 26262. Learn how hazard analysis, fault-tolerant design, and validation build a stronger steer-by-wire safety case.Author:Time:Oct 26, 2026
 How to evaluate a steering angle sensor manufacturer's accuracy claimsEvaluate steering angle sensor manufacturer accuracy claims with practical checks on calibration, latency, and test evidence. Compare suppliers confidently and avoid costly selection mistakes.Author:Time:Oct 25, 2026
 How to diagnose CAN bus faults in a hybrid vehicle control unitDiagnose Hybrid Vehicle Systems control unit CAN bus faults with step-by-step power, wiring, and waveform checks. Find the root cause and avoid unnecessary replacement.Author:Time:Oct 24, 2026